About Those Balls

Alternate title: Love Me Some Balls. (I’m a 13-year-old kid, I swear to God. Or an awesome Alec Baldwin SNL sketch.)

So, anyhoo, I made some meatballs this week and didn’t really think anything of it. Pasta’s a norm around our house (like, a once-a-week occurrence). However, we usually keep it easy and vegetarian, since we’re still eating about 50 percent meat (half of our meals with/without, if you will), give or take a meal here and there.

See, when I grew up, our spaghetti or baked ziti or lasagna (we ate very little of this after a vomiting bug incident…ugh) HAD to have meatballs. Actually, almost every meal had to have meat, but we were a meat-and-potato type family. Mom was June Cleaver, only with a career. #madrespect

She worked on her meatballs for years. She craved perfection. Baked or fried? Fresh or dried herbs? How much garlic is “too much”? WHY ARE THESE FLAT HOCKEY PUCKS INSTEAD OF MEATBALLS??? It was actually a tad entertaining to observe, from a child’s perspective. We always gave honest reviews — a little hard, a little mushy or fally-aparty (technical analysis, I tell ya), no flavor — but, really, they were always good.

One day, she perfected them. Man, was she proud, and I can’t blame her. They were a thing to look forward to.

Fast forward twenty years and my stepdad now makes them. They’re far from perfect, but, hey — a man who makes dinner? Can’t complain about that.

And at our house? I haven’t made them since Hadley came along. I don’t make my own sauce (oh, yes…Mom makes her own, too…talk about self-loathing, points to self), so I just boil some salty water for pasta, throw on a pot of Paul Newman’s organic sauce, and throw a couple of salads together (a “must” for my hubs). It’s just the easiest way for us. Maybe one day I’ll be inspired to make my own sauce. And freeze extra for five future meals. Like Mom.

But, last Tuesday, I had some local, grassfed beef laying around after making chili over the weekend. I could’ve made some mini-meatloaves, which I know my guys love, but I decided to make some meatballs (along with extras to freeze for later — I’m catchin’ on, Ma!) to throw in, too. Hadley’s a carnivorous youngster, so I knew he’d like the flavor. (Yep. I called it.)

Funny thing is, I didn’t think to take pictures or anything. I mentioned it briefly on Facebook and someone politely asked for the recipe — to which I kindly directed them to the Rachael Ray recipe I altered. Apparently, even my altering would be appreciated. Who knew? Lesson learned. Note to self: Take pictures of everything I cook. Ever. Just in case.

So, here are Rachael Ray’s altered balls. 😉 No offense, Rach.

About Those Balls - image 639ec-meatballs1 on https://megactsout.com

Apple Cobbler Thingie

Yay, a dessert recipe! Finally. Or maybe breakfast. Or snack. I love versatile recipes like that, don’t you?? 🙂 Since when did this blog become a crappily photographed food blog?? Eh, it ebbs and flows, I suppose. Side note: Today’s Hadley’s 18-month birthday. Holy crap! One-and-a-half! I guess we need an update on what this kid’s doing, huh? Will do.

So, anyhoo, I borrowed this recipe from Mommy Knows but changed it around a bit. It was a frigid cold day (haven’t we all had those lately?) and I was home from school because of it, so it felt like the perfect time to crank up the oven.

I had some pretty little apples going south for the winter. See? Wrinkly with blemishes. But the girls still had life in ’em.

About Those Balls - image 5c393-photo43 on https://megactsout.com

Sure, I could’ve made some applesauce (not much, mind you), but I wanted something heartier and a tad bit naughty. I WANTED an apple cake of some sort. Instead, I got this apple cobbler-type thing. Just as delicious. Just, um, unexpected.

About Those Balls - image anim_df4befcc-a5b9-9ca4-25ae-616408b73e8b on https://megactsout.com

And, yes, I’m just showing off with that self-made GIF. Get down witchya bad self!

About Those Balls - image  on https://megactsout.com
Gratuitous close-up — ready to be baked. Whuh whuh?? (Apparently I’m into ’90s hip hop phrases today. Roo, I blame thee! Naw, it’s all good.)


So, here’s the recipe. Of course, I added nutmeg and clove to the apple filling part (you could leave them out and just use the cinnamon, but I’m a high roller). I also highly advise serving this warm, if possible, with some ice cream. We have yet to find organic ice cream, so we’ve found a minimal-ingredient “natural” vanilla from Breyer’s that’s a very, very rare treat since it still veers from our food ethics. Ya gotta live, though. Heck, in the summer, I know for a fact that we’ll go to some burger joints (local ones, mind you) and share a cone of unknown ingredients (but quite known yumminess) with the little guy. I know, we’re rebels.

About Those Balls - image 18492-applecake on https://megactsout.com

Oh, and one final thing. When you go visit Mommy Knows, appreciate her not-so-subtle way of telling folks off about letting her daughter use a sharp knife to cut the apples. Love it! And hope you love this apple cake…cobbler…dessert.

Another Weelicious Treat

I made a yummy muffin from Weelicious back in September, and recently decided to try a different kind. I mostly make them for Hadley (because apparently he’s spoiled…who knew? As my husband recently said, “Well, he eats better than we do” to which I thought, “Huh. We eat well, but that’s probably true.”), but they’re great for grown-ups, too. Whether you need a snack to go with a cup of midday tea or coffee, or a quick breakfast option to send to the sitter, these tasty muffins have just the right amount of sweetness and spice to do the trick. 

Weelicious is a site dedicated to feeding kids of varying ages, although are always seem to be some good family-friendly recipes (read: you don’t need kids to eat this stuff). Let’s just say that this post could pretty much be in the form of a love letter to the mom behind Weelicious — as well as a hope that she doesn’t mind my sharing HER recipe, tweaked (not to be confused with “twerked”) a bit. I’m all about giving credit where credit is due — this isn’t my recipe, it’s just the way that I made it. Here’s the recipe she created that gave me a jumping-off point.

And here’s what I made…

About Those Balls - image  on https://megactsout.com

PicMonkey strikes again! (Not perked…by PicMonkey or Weelicious. Just a fan!)

These would be great with walnuts (or almonds, maybe), and I’m always keen on adding some clove and nutmeg to anything apple-laden. We kept it pretty tame for the munchkin since these are essentially his snack/breakfast muffins.

Oh, and full disclosure: For whatever reason, the muffins seemed to stick to the super-cute paper liners that I used. Maybe I didn’t wait long enough for them to cool before digging in (I tried!), or maybe it was just dumb luck, or maybe there’s a fully logical physics-based reason to the issue (I skipped out on Physics, so…yeah…). I’d just suggest a) greasing the pan as advised in the original recipe or b) expect this to happen and accept the inevitable. It seemed better the next day (not completely, but better), so it’s not like all your hard work will end up in the trash along with half of the muffin.

I also found myself (yes, folks) sniffing H’s muffin yesterday. Sniffing it. I have no shame.

Christmas French Toast Casserole

About Those Balls - image  on https://megactsout.com

For Christmas this year, I decided to make things a little easier on myself as far as breakfast was concerned. I guess with any meal, we could make things easier just with some extra planning (it goes for weekly meal planning and sticking to a budget when grocery shopping and a whole buttload of other food stuff that I’m only successful at half the time). So, after spending far too much time preparing our morning feast last year, my thoughts immediately went to french toast — casserole, that is.

Now, I’m not usually a big fan of casseroles, but the ability to make it in advance and pop it into the oven as needed had me at “hello.”

Here’s the meal plan:

The day before (I did the first three earlier before our Christmas Eve get-together, then the last before bed) —
– Cut loaf of French bread into 1″ squares
– Thaw bacon
– Dice/cube (depending on how big you like them) sweet potatoes for hash browns
– Assemble rest of casserole and allow to sit overnight in fridge

The day of —
– Turn on the oven and take out the casserole to sit for 30 minutes — Open stockings 🙂
– After stockings, throw the casserole in and start the hash browns in a frying pan with olive oil, salt, and pepper, over medium-low — this should avoid any burning, and using a lid allows the insides of the potatoes to cook. If you like more brown, start higher and allow them to get some color before turning down.
– After opening the rest of your goodies, check on the casserole, stir the hash browns and cook any sausage/bacon.

If you like coffee, get that started first thing. We did tea, though, which doesn’t take long at all.

The only way that I swayed from the meal plan was thanks to the fact that my boys slept in. So, here I was…up…not doing anything…so, I started the meat and sweet potatoes earlier than I probably should have and kept them at low before serving.

The french toast casserole recipe that I used came from Taste of Home, but while I decided to throw in some extra cinnamon and some nutmeg, it made the top appear burned (but it wasn’t). So, if I make it again, I’ll do a sugar topping (maybe with a little cinnamon mixed in) but probably put most of the seasoning in the egg mixture. Regardless, here’s the recipe, in case anyone wants to try it:

French Toast Casserole

1 loaf french bread, cut into 1″ cubes
8 eggs
3 cups milk (I used whole; you could use half and half, but I wouldn’t do skim or 1%)
4 teaspoons sugar
1 teaspoon vanilla
3/4 teaspoon salt
a few sprinkles of cinnamon (or you can mix more directly into the casserole)

Topping:
2 tablespoons butter
3 tablespoons sugar
2 teaspoons sugar
1/2 teaspoon nutmeg

  1. Place bread cubes in a greased 13-in. x 9-in. baking dish. In a large bowl, whisk the eggs, milk, sugar, vanilla and salt. Pour over bread. Cover and refrigerate for 8 hours or overnight.
  2. Remove from refrigerator 30 minutes before baking. Dot with butter. Combine sugar and cinnamon; sprinkle over the top.
  3. Cover and bake at 350° for 45-50 minutes or until a knife inserted near the center comes out clean. Let stand for 5 minutes. Serve with maple syrup if desired. Yield: 12 servings.


So, what do you do for holiday mornings? (You know — those days when things are crazy enough without having to figure out a way to sustain the family until that late afternoon meal.) Casseroles? Do you eat breakfast? Brunch? Do tell! It’d be great to hear how other folks juggle the holiday craziness. 

On that note, I hope you all had a wonderful Christmas! It seems to have come and gone so quickly!

Here We Come A-Wassailing

About Those Balls - image  on https://megactsout.comAlmost every year, we haul our heinies out to Cooperstown to the Candlelight Evening the Farmers’ Museum puts on (we skipped last year since the bambino was, like, crazy little…I use “little” loosely). The Farmers’ Museum is seriously one of my favorite places ON EARTH. It’s a living history site where houses and buildings from the mid-19th century have been transplanted to create a small village-like atmosphere. 


There’s a building with an exhibit, but the rest is like a step back in time. The print shop creates mailers and flyers for events; the blacksmith makes shoes for the horses (it is the Farmers’ Museum, after all), old flat, square-headed nails, and products for the store; the “house” has a front AND back garden (GAH! LOVE IT!) and, depending on the time of year, shows how folks were putting things up or weaving and dying their own clothes or baking up a storm; the broom-maker (I’m sure that’s not the real name) shows how they were made; the “hotel” (which has an awesome balcony) is opened serving food and showing just how different it was to stay in an inn back then…and so on. I wish I could live there.

So, this year, we literally braved a brutal storm to have a family visit. There was only one goal for the day — to see Santa. The REAL Santa. We actually know the fellow who portrays him, so the fact that he says “hello!” to us by name is beyond cool. He dresses more like St. Nick, with short pants (freeeezing!), a real beard, a long hat, and a big sack flung over his shoulder.

But, thanks to the storm (we’re freaking crazy — we always plan for the coldest possible weather — I wore 2 pairs of pants, wool socks, 3+ shirts, a hat, two pairs of gloves…still cold), there were hardly any lines. So, that being said, we got to have our first ride on a horse-pulled wagon (where Hadley viewed Santa, or “Ho Ho”, from a mile away), chat up the printer on our own (I have a secret: This is the warmest spot in the place, thanks to their TWO stoves. I learned it on my 4th grade field trip, when I was assigned to the print shop and got to create my own “business cards” and “greeting cards”. You’re welcome.), and down some wassail.

About Those Balls - image  on https://megactsout.comWe caught up with Santa before he started his story time at the school building, and Hadley was enamored with him. Oh, he also handed over an old-fashioned (albeit red dye-laden) chunky peppermint stick which he sucked on for a half hour. (I grabbed chunks out of his mouth and ate them so he didn’t choke. He still doesn’t have enough top teeth to help in this respect.)

Then, we finally headed indoors to hear some more caroling and buy two HUGE turkey dinners (which came with cocoa and HUGE pieces of gingerbread, which Hadley enjoyed) before trekking back home at half the speed in low visibility. But, we don’t care. It. Was. So. Worth. It.

So, if you’d like to experience some of the old fashioned Christmas, try some mulled cider. Wassail. Whatever you call it, it’s a lovely way to cozy up on a chilly winter’s night. And what makes it even better? It’s super simple to make. You don’t even need cauldrons over huge bonfires (which is how they do it at the museum).


Here’s another one of my “wing it” recipes, but it’s only because you really can’t mess it up. Want to sweeten it? Use maple syrup or sugar or whatever you like to use to sweeten stuff. Or don’t; it’s still delicious!) Don’t have cloves? That’s okay, leave it out this time (although use it when you have it on hand again…I respectfully advise. ;-)).

WASSAIL

2 1/2 cups apple cider
1/4 – 1/2 c. orange juice
1 -2 tbsp. maple syrup or sugar (or not)
1 tsp. (or less) cinnamon; or 2-3 cinnamon sticks
1/2 tsp. (or less) nutmeg
1/4 tsp. (or less) clove

Bring all the ingredients to a boil on the stove and stir; reduce heat to low and allow to simmer for as long as you can wait. (Five minutes…ten…or thirty. Whatever floats your boat.) If you don’t like “things” in your beverages, strain into mug and enjoy. Serve with a cinnamon stick if you’re a fancypants.

* Grown-ups who REALLY need a warm-up, throw a shot or two of rum in and say “good night.” Or, at least, that’s what would happen to me. I really can’t hold my booze anymore.

C is for Cookie, That’s Good Enough for Me

About Those Balls - image  on https://megactsout.com

Is it not the strangest thing in the world that the characters that we grew up with so many decades ago are still cherished by the youth of today? There must be something innately appealing to little ones. The fur? The colors? The voices? Hadley is enamored with Sesame Street characters (he watches the old episodes as well as the new ones, although we try to skip over that Abby Cadabby crap) as well as Mickey (I’m 50/50 on this one — I love that he enjoys “A Mickey Christmas Carol” from beginning to end, but I don’t want him to be surrounded with Disney paraphernalia or to feel the need to visit the “most wonderful(ly overpriced) place on Earth”). Along with his dozen or so words, he has gestures for each of his favorite Sesame Street characters — “bam bam bam” (arm with fist pounding) for Oscar and “nom nom nom” (open hand to mouth repeatedly) for his favorite, Cookie Monster.

So, while I made Christmas cookies last year, this is the first year that OUR little Cookie Monster can actually partake in the treats. I try to keep my versions “real food” friendly — using butter instead of Crisco, organic raw sugar rather than white, unbleached organic AP flour rather than the regular bleached (I didn’t do whole wheat because I wanted to try to keep the consistency relatively similar, but you could do half-and-half or even all whole wheat if you don’t mind a texture switcheroo), and so forth. Honestly, most of what’s in these is organic and GMO-free, which is our priority right now.

Oh, and fun fact time: I only make cookies my husband will WANT to eat. Sure, he’ll eat my favorites (anything with peanut butter), but he doesn’t necessarily WANT to, which means he ends up “forgetting” they’re sitting in our cookie container until they go stale or I eat them all (whichever happens first…ahem). So, I ask Dave what his favorites are, fully realizing that my mom or sis or someone equally lovely will provide me with a couple of peanut blossoms or chocolate-covered peanut butter balls at some point this holiday season…and I sleep soundly knowing that my hubby and son will eat the crap out of whatever I have made. It’s all good. Maybe one day (when he’s able to eat nuts; we’re not testing his allergy levels to nuts quite yet!) I’ll have a house full of kids that will override Dave’s aversion to “super peanut buttery” things. That’ll be the day!

I made these cookies in less than an hour each on two different nights, after Hadman had gone to bed. First was the jam thumbprints.

Now, back in the day, I used to make these with Ina Garten’s recipe (my mom LOVED them when I made them — isn’t that the greatest feeling, to make something for the person who made everything for YOU and to have them enjoy it that much?), which was so full of butter I can’t even stand it (yum!). But, I didn’t use that recipe because a) they made a million cookies (we don’t need a million) and b) they were covered in coconut. My husband’s a basic guy, so I made the equivalent of shortbread cookies…with a thumb smashed in…with some wayward jam poured in for good measure.

Here’s the recipe I used (from Love and Olive Oil – LOVE this site!) —

Jam-Filled Thumbprint Cookies

Yield: 40 cookies
Cook Time: 20 minutes
Total Time: 1 hour

Ingredients:

  • 1 cup (2 sticks) unsalted butter, room temperature
  • 2/3 cup granulated sugar
  • 2 large egg yolks
  • 1 teaspoon vanilla extract
  • 2 cups all-purpose flour
  • 1/2 teaspoon salt
  • 6 ounces (or so) assorted jam

Directions:

  1. Preheat oven to 375 degrees F. Line a baking sheet with parchment paper or a silicone mat.
  2. Beat together butter and sugar with an electric mixer on medium-high speed until light and fluffy, about 2 to 3 minutes. Beat in egg yolks and vanilla extract. Add flour and salt and mix until incorporated and dough comes together in a ball.
  3. Form dough into 1-inch balls and arrange on prepared baking sheet. Flatten balls slightly with your thumb or the back of a small spoon, leaving an indentation in the center.
  4. Bake cookies for 8 to 10 minutes or until bottoms are just barely golden. Remove baking sheet from oven. If indentations look shallow, further define them with the back of a spoon and then fill each with approximately 1/2 teaspoon jam. Bake for an additional 3 to 4 minutes, or until jam melts slightly and edges of cookies are lightly golden. Transfer cookies to wire racks to cool.


Read more at http://www.loveandoliveoil.com/2013/09/jam-filled-thumbprint-cookies.html

Jam-Filled Thumbprint Cookies

1 cup (2 sticks) unsalted butter, room temperature
2/3 cup granulated sugar
2 large egg yolks
1 tsp. vanilla extract
2 cups all-purpose flour
1/2 tsp. salt
6 oz. (or so) assorted jam (I used a test pot of “razzleberry” jam, some apple butter {Delish! And super sweet}, and some strawberry/blueberry/rhubarb jam)

Preheat oven to 375 degrees F. Line two baking sheets with parchment paper (not waxed) or a silicon liner (I used parchment on one but ran out and used butter on the other; they both came out fine).

Beat together butter and sugar with an electric mixer on medium high until light and fluffy, 2-3 minutes. Beat in egg yolks and vanilla. Add flour and salt and mix until incorporated and dough comes together in a ball.

Form 1-inch balls and arrange on baking trays (they won’t expand much at all). Press slightly with your thumb or the back of a teaspoon to form an indentation for the jam.

Bake for 8-10 minutes until bottoms are barely golden. Remove from oven. If indentations look shallow, press a bit more. Place approx. 1/2 tsp. of jam or jelly in each indentation before placing back in the oven for 3-4 minutes (until lightly golden). Transfer cookies to cool on a rack.

Jam-Filled Thumbprint Cookies

Yield: 40 cookies
Cook Time: 20 minutes
Total Time: 1 hour

Ingredients:

  • 1 cup (2 sticks) unsalted butter, room temperature
  • 2/3 cup granulated sugar
  • 2 large egg yolks
  • 1 teaspoon vanilla extract
  • 2 cups all-purpose flour
  • 1/2 teaspoon salt
  • 6 ounces (or so) assorted jam

Directions:

  1. Preheat oven to 375 degrees F. Line a baking sheet with parchment paper or a silicone mat.
  2. Beat together butter and sugar with an electric mixer on medium-high speed until light and fluffy, about 2 to 3 minutes. Beat in egg yolks and vanilla extract. Add flour and salt and mix until incorporated and dough comes together in a ball.
  3. Form dough into 1-inch balls and arrange on prepared baking sheet. Flatten balls slightly with your thumb or the back of a small spoon, leaving an indentation in the center.
  4. Bake cookies for 8 to 10 minutes or until bottoms are just barely golden. Remove baking sheet from oven. If indentations look shallow, further define them with the back of a spoon and then fill each with approximately 1/2 teaspoon jam. Bake for an additional 3 to 4 minutes, or until jam melts slightly and edges of cookies are lightly golden. Transfer cookies to wire racks to cool.

Read more at http://www.loveandoliveoil.com/2013/09/jam-filled-thumbprint-cookies.html


The other cookie that Dave requested, which I also made last year, was Chocolate Crinkles (although he just called them “the chocolate ones that get wrinkles all over with white sugar all over them”). It took awhile to find one that just used cocoa powder (homey don’t got time for meltin’ chocolate), and all I had was some leftover Hershey stuff (and while it’s not organic, it’s natural, non-alkalized, etc so it’s pretty good), but my powdered sugar was organic from our trip to Vermont and they came out just right — puffy and “wrinkly” and tasty.

For this recipe, I turned to Williams-Sonoma. Wait, what?! Yep. I scoured the Internet (okay, the first page of the Google search) and it hit all the marks: 1) used cocoa powder vs. melted chocolate (or a combo of both) and 2) only made a couple dozen cookies (again, we don’t need a million hanging around that won’t get eaten and will turn stale). And, for future reference (to myself…hi, future self!), it’s from a kid-friendly cookbook…so, yeah, Hadley can help someday.

Chocolate Crinkle Cookies


1/2 cup confectioners’ sugar
1 2/3 cups all-purpose flour

1/2 cup unsweetened cocoa powder
(reviews suggest between this and 3/4+; use what you like)
1 1/2 teaspoons baking powder

1/4 teaspoon salt

8 tablespoons (1 stick) unsalted butter, at room  temperature
1 1/4 cups sugar

2 eggs1/2 teaspoon vanilla extract


(Love that the recipe said this: “Be sure an adult is nearby to help.” I asked my husband to stand by. ;-))


Preheat an oven to 350°F. Grease 2 baking sheets with butter.

Put the confectioners’ sugar into a bowl and set aside. (I didn’t use half of this amount, so feel free to start with half and use more as needed.)

In another bowl, using a wooden spoon, stir together the flour, cocoa, baking powder and salt. Set aside.

In a large bowl, using an electric mixer, beat the butter and sugar on medium speed until creamy, about 3 minutes. Turn off the mixer and scrape down the bowl with a rubber spatula. Add 1 egg and beat on medium speed until blended. Add the other egg and vanilla and beat until blended. Turn off the mixer and add the flour mixture. Beat on low speed just until blended.

Using a tablespoon, scoop up a rounded spoonful of dough. Scrape the dough off the spoon into the palm of your other hand. Roll the dough into a ball. Roll the ball in the confectioners’ sugar until covered. Place the balls on a prepared baking sheet. Repeat, spacing the balls about 2 inches apart.

When 1 baking sheet is full, put it in the oven and bake the cookies until they are crackled and puffed, 10 to 12 minutes. Using oven mitts, remove the baking sheet from the oven and set it on a wire rack for 15 minutes. Using a metal spatula, move the cookies onto the rack and let cool completely. Repeat with the rest of the cookies. Makes about 24 cookies.

Adapted from Williams-Sonoma Kids Baking, by Abigail Johnson Dodge (Oxmoor House, 2003).

I’m thinking of throwing together a molasses or ginger-type cookie since it’s another kind that I DIE for — maybe my grandmother’s recipe (though I’m not sure if I have the right “kind” of molasses for that; seriously, they can end up taking up the whole pan if you’re not careful, and I’m not aiming for molasses bars) or something like that. I also do cutouts, which we’ll probably attempt as more of a hands-on family thing if Hadley actually wants to “make shapes.” If not, I’ll still make them and hopefully get a good, soft texture (vs. crunchy…you know the kind) so he can at least eat them afterwards. And, a nice, fluffy white frosting sounds perfect — no dyes necessary. If I don’t make these, though, it’s fine — at least I made SOMETHING. But, if I do make something, I’ll be sure to share the recipes.

What about you? What cookies are you making this Christmas? Or if you’re not baking any, are there any kinds that you’re looking forward to eating? I’m always fascinated to hear what kinds of cookies folks consider a “Christmas cookie.” Some are traditional (like Polish Kruschiki or regelach – which I always thought was Italian, but the interwebs informs me is Yiddish – both of which I enjoyed as a child) while others make me go “huh?” (um…chocolate chip cookies? Really?) Do tell!

Yo, Yogurt!

Happy Friday the 13th, y’all! As you may or may not know, every time one of these “unlucky” days rolls around, I count my blessings — Hadley was born on a Friday the 13th and he was obviously one of the luckiest things to ever happen to me. 😉 So, happy 17-month birthday, munchkin!

During a recent trip to Hannaford, I discovered that they were no longer carrying Stonyfield’s organic “YoBaby” yogurt. (The toddler version is low-fat. Our homey don’t play that. I, however, have jumped back on the bandwagon of Chobani low-fat Greek yogurt. Purely for taste reasons.) So, I finally decided to make a poop-or-get-off decision to make our own organic, whole milk, minimal ingredient take-along yogurt for Hadley to bring to the sitter.

I even made it “fruit on the bottom.” Score!

About Those Balls - image blogger-image-1810184499 on https://megactsout.com


I took my mini Ball storage jars and put some thawed, cut-up strawberries (with a little juice from the bag) in the bottom, followed by a few spoonfuls of plain, whole milk yogurt. Easiest. Recipe. Ever.

You can also make it vanilla by adding a teensy bit of vanilla extract, or sweeten it with a drizzle of maple syrup. I’ve also thrown in blueberries or applesauce with some cinnamon. The possibilities are almost endless. Well…within reason. 😉

And, for a special treat, I’m sure some organic chocolate syrup (yes, it exists…stop laughing ;-)) would be cool.

Pouch Disappointment

Yep, it’s a Friday Foodie post, but of a different ilk. (I love that word. Ilk. Ever since I heard Dave Foley say it on “The Kids in the Hall” back in the day, I thought, “That’s a word for me.” Dork, thy name is Megan.)

I got an email the other day from my hubby directing me to this site. I then went directly to the horse’s mouth, and eventually discovered that we had three of the aforementioned recalled pouches in our collection. Actually, I was kind of relieved that it was only three, but it’s always a little disconcerting when you look at the rest of the pouches you do have and think, “Hmm…should we be using them??”

Since he was clearly on a roll, Dave then shot me a link to this video. Be forewarned: There are bugs (or baby bugs, as it were). Gross. We admit that there’s a chance (conspiracy theorists that we are) that it’s someone trying to debunk organic foods, for whatever sinister reason…but it’s just too questionable to ignore. I couldn’t stand the thought of Hadley sucking on one of those things, unknowingly eating larvae or some other such nonsense.  

See, we’d gotten out of the habit of making baby food since, well, he’s hardly a baby anymore. *sniffles* He eats mostly adult food, cut down to size, which helps a lot since we no longer have to literally spoon feed him, plus it’s great for his coordination and pincer skills. Win, win.

However, this kid is a bit of a pig. I recall my big brothers eating constantly as teenagers, and I can’t help but think he’s going to be a tall glass of water just like them. He’d eat all day if you let him. Seriously.

So, to round things out, we throw him a pouch or two each day. My mother always comments that they’re not worth the money considering that he sucks them down in about fifteen seconds flat, but I know they tide him over and we always ensure that they’re organic and not full of sugars and additives. They just help.

After seeing this, though, I’m wary. We have some pouches on hand that I know I’ll keep using. But, it looks like I’ll be using them sparingly…then returning to making baby food. I guess it’s Baby Food 201 (vs. 101…get it? Like college? *ahem*).

And in the interest of full disclosure, when I looked at these links, I became distraught at the thought of not only figuring out what to give him for regular food everyday, but to put the time back into grinding down food into a thick liquid for him to slurp down in no time at all.

Yet, I let it mull in the back of my head and put aside my stubbornness (very challenging, I might add), and immediately set off to make a few servings.

Here’s how I roll…

Firstly, for storing foods for Hadley, we use a combination of mason jars (the tiny ones are getting to be a tad TOO tiny, but I still throw some applesauce or yogurt into them as a snack) and our smallest BPA-free glass-and-plastic/silocon-topped storage containers. It works for most things, but those pouches were just so damn easy, it’s hard to ignore the fact.

Warning: Highly technical description ahead. A friend of ours gave us an awesome gift that included pouches that you set into a plastic thingamabobber where you could shmush the baby food down a tube and into the pouch. Um. Easier said than done. (And it wasn’t that easy to describe, LOL.) As Hadley’s food got thicker, the wateriest part of the baby food would leak out and create quite the swear-fest from our kitchen. I’m going to revisit those pouches to see if there’s a way to just use a funnel and be done with it; it would suck to waste those, especially since the pouches look almost exactly like the Earth’s Best and Plum’s ones we currently purchase.

But, awhile back (before he was even on mush/solids), I got a package of green goodies to review for Green Child Magazine. One of the items was a pouch with a heavy duty zip top that you could easily funnel food into called the Little Green Pouch. So, I broke that bad boy out (after a bit of hunting) and tested it for realsies (I used them back in the day, but Hadley wasn’t at that “suck independently from a pouch” stage yet).

Here’s a quick recipe I threw together:

About Those Balls - image  on https://megactsout.com

 
Sweet Potato Apple Pouch Provisions

1 Sweet Potato, peeled and diced/chopped (the smaller, the less time it takes to cook)
1-2 Apples, peeled and diced/chopped
1-2 c. Liquid (water, apple juice, etc; we used apple cider, but use whatchya got, and depending on how thick you want it, use more or less liquid)
a few dashes of seasoning like cinnamon or cumin (optional; I didn’t use anything and it was friggin’ delicious…good enough for an adult to take for lunch as soup, I kid you not!)


About Those Balls - image  on https://megactsout.com


Throw everything into a pot and bring to a boil, then put a lid on it (ha!) and reduce the heat. Allow to boil until the sweet potato is super soft. Stir occasionally. (We cooked dinner, ate it, did dishes all while this cooked, so it was awhile but it’s not like you have to stare at the thing while it cooks.) There will still be liquid, but you want it.

About Those Balls - image  on https://megactsout.com


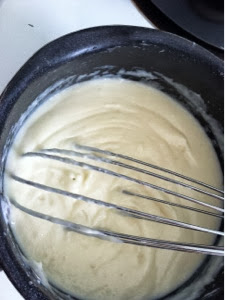
Take it off the heat and use an immersion blender (mine was a Christmas gift last year, but you can find them under $20 and they’re WELL worth it!) to puree. I did this for a few minutes to ensure that it was all wicked smooth. Add more liquid if needed. Allow to cool for a few minutes.

About Those Balls - image  on https://megactsout.com


Then, I opened up the zipper and used a funnel and a spoon to fill that sucker up. It’s sitting in our fridge, along with the leftovers (I can refill the pouch with it as needed; this makes 3-4 servings of 5-6 ounces, depending on how big your sweet potato is).

About Those Balls - image  on https://megactsout.com


By the way, this was a small batch because I had to use up the sweet potato and I had that brain drain goin’ on that happens to us all post-5pm (okay, some days it’s post 5am). So, multiply it as needed. 😉

About Those Balls - image  on https://megactsout.com


These bags are freezable, too, so if you’re using this type of system be sure to leave a little head room. I also make sure that I let it cool completely before shoving it in the freezer, just because I suck at science and am never sure if something’s going to explode in there. #aintnobodygottimeforthat #thatnevergetsold

So, we’ll see what time I can find to make some more of these up. It’s pretty obvious that I’m going to look into purchasing some more “Little Green Pouches”, too. I’m not sure what other veggies will work (it feels like forever since I’ve had to make baby food, although I could count it in months) — green beans can get a tad stringy and not break down all the way, but peas are perfect. I’ve got a squash just begging to be used, to hopefully he still likes that flavor. Just take some time to experiment! At least we know there won’t be maggots or any other unthinkable crap in it. Just my cookin’. 😉 

Perfect Pumpkin Cookies

I know you guys are jonesin’ for some sweetness after last night’s candy overload, am I right? No? Well…too bad. 🙂

One of my favorite cookies as a kid were a super moist pumpkin one that my mom crafted masterfully. They were generally accompanied by a super sweet cream cheese frosting (which I LOVED, of course, since I had a sweet tooth…now, I don’t find it necessary), but I wanted to keep these as natural as possible. They’re low on the “real food” scale, but I wanted something close to the original…and, at least the ingredients were 95% organic. 🙂

But, most importantly, they taste insanely close to the original. Yay! And these are super baby-friendly. Double yay!

The recipe I started with came from Live Renewed, but I made a few small changes. Like, teensy tiny.

Pumpkin Cookies
(Makes between 36 and 42, depending on how big you like them. That’s what she said.)

Ingredients:
1/2 cup butter (softened)
1- 1 1/2 cup sugar (depends on how much you want; I used raw organic)
1 egg
1 15 oz. can of pumpkin
1/2 cup yogurt (we used Stonyfield whole milk plain…yes, whole milk)
1 tsp. vanilla
2 1/2 cups flour (we used unbleached organic all-purpose whole wheat…there’s a mouthful for ya!)
1 tsp. cinnamon
1 tsp. nutmeg
1 tsp. baking soda
1 tsp. baking powder
1/2 tsp salt

Preheat the oven to 350 degrees and grease a couple of cookie sheets.

In a stand mixer (or using a hand blender; use whatchya got), cream the butter and sugar together. Any kitty assistance you can conjure up definitely helps; even if just some moral support.

Pardon the crappy iPhone pics. My camera’s on the blink.

About Those Balls - image blogger-image--1045260570 on https://megactsout.com

Add the egg…

About Those Balls - image blogger-image-1683080194 on https://megactsout.com
…and blend. (Earth-shattering stuff here, people.)

About Those Balls - image blogger-image-1754892113 on https://megactsout.com
I then added the vanilla, spices, salt, baking powder and baking soda…

About Those Balls - image blogger-image-791954394 on https://megactsout.com

Then the flour. Try not to over-mix.

About Those Balls - image blogger-image-478653152 on https://megactsout.com


Drop by teaspoonful onto the greased sheet pans and bake for 10-12 minutes. Allow to cool on the sheet for 10+ minutes before transferring to a cooling rack. (Confession: I don’t have a large enough cooling rack to actually make cookies; just a tiny, round one. I transfer to a paper towel. I know, I’m naughty.)

Finally, take beauty shots of the moist, bouncy, only-needs-frosting-if-you-want-it deliciousness. Or not. Your call.

About Those Balls - image blogger-image--1933556112 on https://megactsout.com
Happy Halloween Hangover day, everyone! Time to hang up our hats and capes for another year…unless you’re dressing like a Pilgrim for Thanksgiving. To which I say — “Way to commit!”

It’s the Perfect Day For…

…soup! What can I say? Between the fact that it’s super cheap, relatively easy, and a great way to use up any not-yet-rotten-but-kinda-turning veggies, what’s not to love? Not to mention, it’s super cozy when things start to get chilly…which they have.

And, you lucky people you, here’s a two-fer. Take your pick! They’re both tasty and perfect for the cold weather.

Side note: I’m thinking of giving my life some organization (psht! Right!) and rhyme-to-my-reason by posting any food/recipe ideas on Fridays. Get it? Foodie Fridays? I know, it’s a push, but that’s how I work. And while I’ve got a pile of recipes to share, I don’t expect to do a Foodie Friday every week. They’re just relegated to Fridays…y’know, so that the rest of the time isn’t taken over by “All Food, All the Time!” …If ya catch my drift.

Butternut Squash Soup
1/2 – 1 onion, chopped (depends on size and how much oniony goodness your family likes)
1 butternut squash, peeled and chopped (be careful! That sucker’s slippery)
1 apple, peeled, cored & chopped (any kind)
1 quart broth, either veggie or chicken, homemade or store bought
Small bunch of fresh sage (maybe 10-15 leaves), chopped
1-2 bay leaves
1/4-1/2 tsp. cinnamon (or to taste)
1/9-1/4 tsp. nutmeg (or to taste)
Salt & pepper to taste
Additional water as needed

Throw everything, except for S&P and additional water, in a pot and bring to a boil. Turn heat down and allow to simmer for 30 minutes (give or take; if you’ve got the time, let it go longer). Discard bay leaves and use an immersion blender to blend until smooth (or, in small batches, whir in electric blender), adding water if too thick. Add salt and pepper and test for seasoning. 

About Those Balls - image blogger-image-666621404 on https://megactsout.com
I served this with a sprinkling of sharp Parmesan cheese. The baby loved his (below left), and I added some pumpkin seeds and dried cranberries to the “grown up” bowls (right). As with most soups, better the next day! This freezes quite well.

*Vegetarian if using veggie stick, which I did. 🙂

About Those Balls - image blogger-image--739339486 on https://megactsout.com

Ham and Potato Soup

(I started with this recipe from All Recipes but switched it up a bit; gotta give credit where credit’s due)
3 1/2 c. potatoes, peeled & diced
1/3 c. celery, diced
1/3 c. carrots, sliced
1/2 – 1 onion, chopped
3/4 c. ham, diced (I used the fat that’s usually trimmed and it MADE this dish! Fat is not always bad, folks, just eat it in moderation…that’s my lesson for the day)
3 1/4 c. broth (veggie or chicken; you can also use water and bouillon but homey don’t play that)
S&P to taste
3-5 tsp. butter
3-5 tsp. flour
~2 c. milk
Cheddar cheese for garnish (and deliciousness)

Throw the first six ingredients in a pot and bring to boil. Turn heat down and allow to simmer ’til you’re good ‘n ready. In a separate pot, melt butter and add flour one tsp. at a time, whisking all the while…

About Those Balls - image blogger-image--19613295 on https://megactsout.com

Keep whisking! This’ll take a few minutes, but is totally worth it. (The floury taste needs to be cooked out.) Add milk and continue stirring until the whole shebang comes together and seems cooked enough, 5-10 minutes (depends on your level of patience…mine took me JUST to about 5 minutes.) Should be pretty thick…

About Those Balls - image blogger-image--59354482 on https://megactsout.com

Add the above mixture to the already-in-progress soup and stir together. Cook for a few more minutes (or allow the flavors to come together further and simmer all afternoon; you’re the boss here!) and serve hot.

Serve with a sprinkling of cheddar (or some toasted bread or croutons, if you like). This, too, was better the next day, but Dave highly enjoyed it the day-of.


About Those Balls - image blogger-image-889099203 on https://megactsout.com

Keep warm this weekend, folks! What’s YOUR favorite soup? Or do you prefer chili on these football-watching, Snuggie-wearing nights?